Shooting from a Moving Vehicle
I was headed back from Lake Powell in southern Utah. It was a long drive home and there just wasn’t time to take advantage of all the wonderful photo opportunities flashing by and still keep my travel companions from lynching me.
Finally, though, I just couldn’t take it anymore. I reached for the camera, adjusted some settings and began to burn through electrons. As the scenery whizzed past, I happily clicked away, learning as I went.
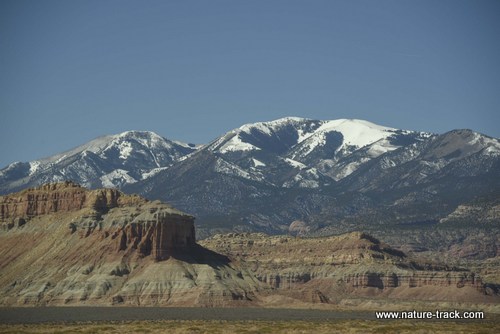
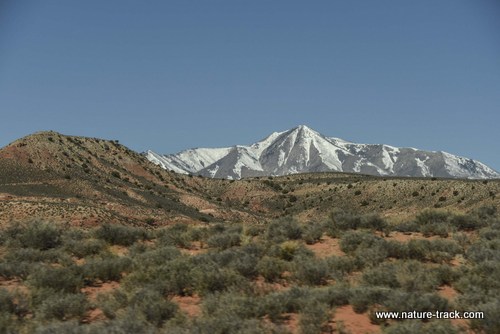
I found that my Nikon D810 with a 28-300 zoom lens was a perfect combination. Although I shot most images at a fairly wide angle, the telephoto did come in handy for more distant objects and to do in-camera cropping.
The lessons I learned that day have helped me produce some pretty nice images on the fly. The first lesson was shutter speed. In order to have a shutter speed of at least 1/400th of a second or faster to stop motion, I needed to set my ISO at 800 or higher. Many of my images were taken at 1/2000th to 1/6400th of a second at ISO 800. It was a sunny day and 800 or 1000 ISO was sufficient and I probably could have gotten away with ISO 400. A more overcast day might require more. The key is to get a fast shutter speed, so set your ISO accordingly. I also turned on vibration reduction because there is no way to use a tripod. It is too slow and could pick up vibration from the vehicle. Lesson: Hand hold the camera and don’t lean against the car.
The next lesson is that even with a shutter speed of 1/400th second, things close to the road may have motion blur. If you want that look, then you are in luck because it is going to happen. If you don’t like that look, you need to be more particular in your shooting. I found that I would have to watch forward and be ready when there was a break in the vegetation or the road bank dropped away. By looking ahead, I was able to plan when to shoot without foregrounds that either blocked much of the image or were blurred. It would help to have the driver alert you of openings coming up so you can stay focused on the camera. When there is a break in the vegetation, begin shooting before it arrives and run the motordrive on high speed if you have the option. You’ll find at least one image that works that way.
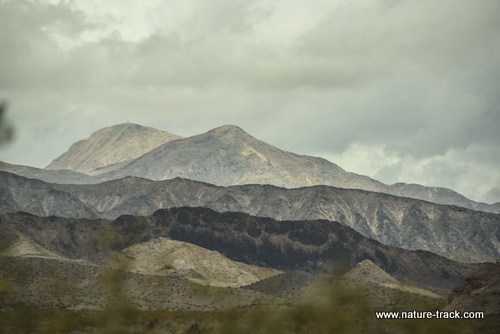
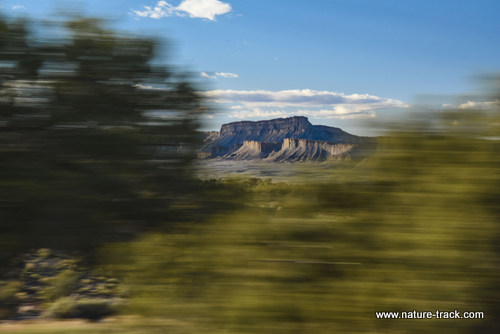
For me, the blurred plants here don't add to the photo at all. I would send this one to the trash.
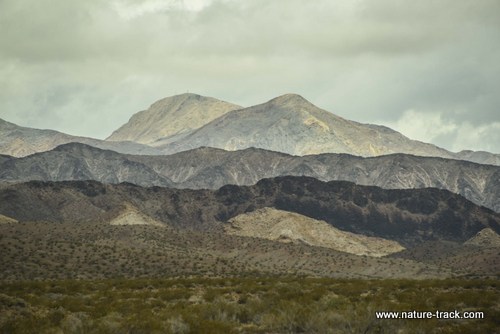
This one is much better. I waited for a hole in the roadside shrubs and then shot.
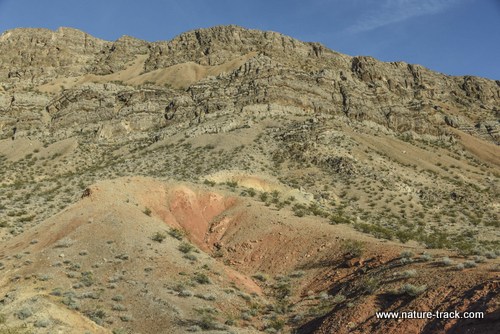
There are a couple of other reasons to avoid the plants right along the road. You will likely be shooting at f8-11 and that usually doesn’t give enough depth of field and foregrounds will be out of focus. Also, the plants in the foreground are often messy and getting a decent composition with them is really a challenge at 60 mph. Of course, you can always delete too.
With the vegetation close to the road, even shooting at 1/800 second, the plants blur. It is really difficult to not have this happen so it is better to avoid the foreground plants altogether. Also, because the vegetation is so close, getting an image sharp front to back would be almost impossible without a tilt/shift lens or using the computer and stacking focus, even if the photographer was stationary.
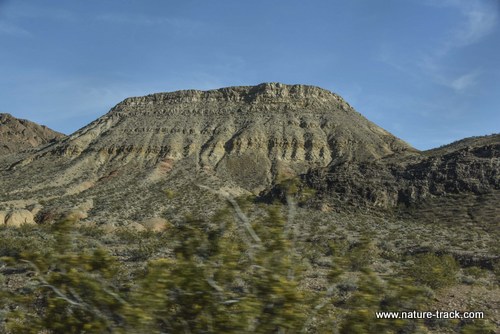
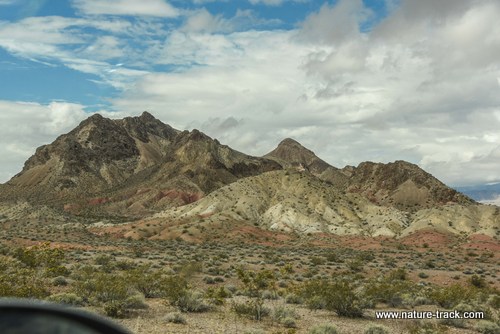
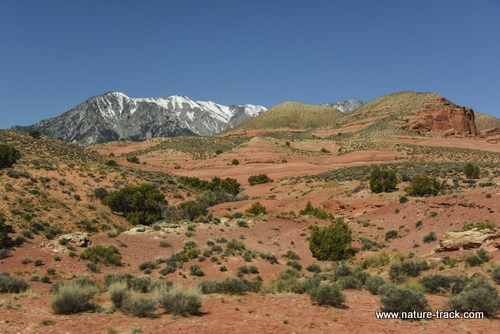
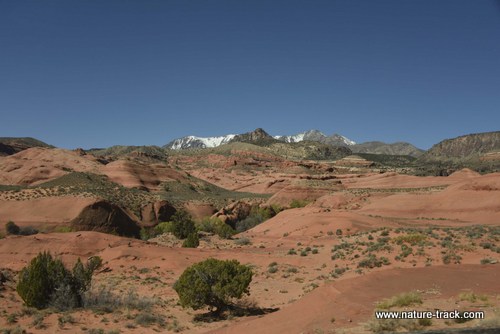
You can still do foreground, middle ground, background though. You just need to put your foreground a little further out. Look for leading lines like creeks and washes to create depth.
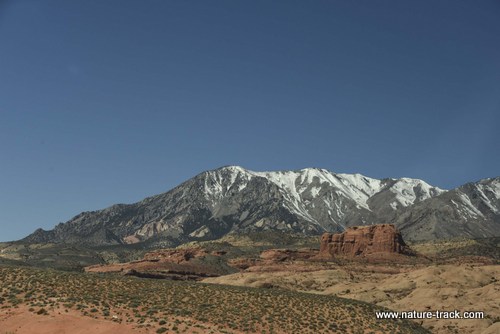
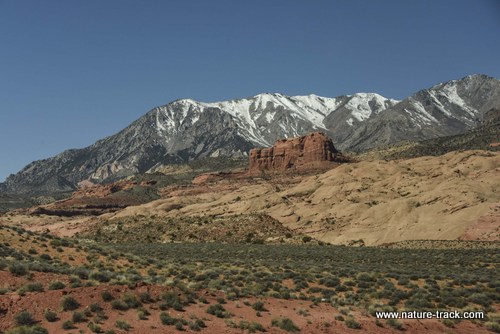
The foreground here is still a bit soft, but all in all this isn't a bad photograph and shows that you can have fore-middle-background--just start a bit further out for the foreground.
I also quickly found out that using a polarizing filter doesn’t work through the side window. If you try looking out a side window with polarizing sunglasses, you will literally see spots. The tinting in the side windows must be what causes this, but the effect is that you will see darker circles or ovals pretty much in a grid pattern. The same thing happens with a polarizing filter. To avoid this image ruiner, remove the polarizer or keep the window rolled down.
If you don’t roll down the window, you will need to pay particular attention to reflections off the window glass. Get as close to the glass as you can to minimize reflections.
Shooting out of the front or rear windows doesn’t work. The glass angle and curvature creates such a distortion that the images aren’t acceptable in most cases. With that said, if that is the only angle that works, take it anyway! These are guidelines, not rules, do what you have to in order to get the image.
I have more than a few images in which I can see a corner of the car’s mirror. This can be a real challenge on trucks with bigger mirrors, but at least with trucks, the mirror can be pushed out of the way (assuming that the driver doesn’t need it. Best to ask first). If you can’t get the mirror out of the way, then you won’t have much ability to shoot angling forward without the mirror spoiling the shot. If you can score a window in the back seat, that is probably the best option.
It is easy to get the corner of the mirror if you are in the front seat. This can be cropped out later, but it is better to sit in the back seat and not have to worry about it.
Shooting at an angle, either forward or backward, is another way to improve sharpness by reducing the apparent motion of the vehicle. Shooting 90 degrees out from the car maximizes the potential for image blur because of motion. If you are traveling at 60mph, you are going to have 60 mph worth of blur to deal with. If you shoot at, say, 45 degrees forward or backward, you have reduced the apparent speed of the vehicle significantly. This can mitigate for slower shutter speeds in some instances.
Finally, the rules of composition still apply but can be much more challenging. It is difficult to keep the camera level, find a leading line or an interesting foreground at a reasonable distance and otherwise compose a pleasing image and do it at 60-70 mph. The secret here is to shoot a lot of images. Let me repeat that: shoot, shoot, shoot! Each instant that passes is a different scene so get them all and choose later. Back in the film days, I wouldn’t have even tried much of this but electrons are free and the delete key is just a stroke away. Shoot first, shoot a lot and evaluate later.
These two examples demonstrate that you can have foreground, middle ground, back ground, leading lines and other composition elements even at high speeds.
This is an example of a creative blur. I slowed the shutter speed down a little and waited for some trees really close to the road that I could frame the mesa with. I kind of like it.
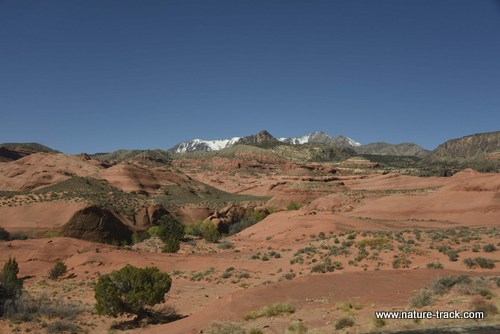
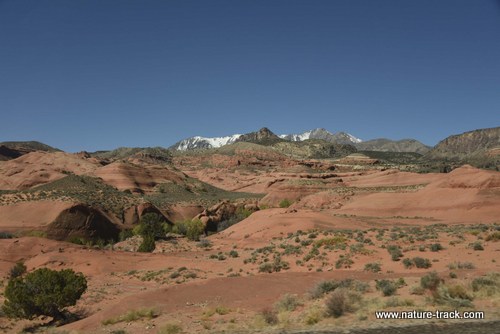
Shot at almost 5 frames per second, this sequence of three shows how fast the scene changes (use the juniper at the bottom for a reference). Literally, no two seconds provide the same opportunity. Every one is slightly different.
This may be just me, but one composition challenge I consistently have is leaving too much room at the top of the image. I suspect that I am trying to avoid something in the foreground but I am not sure. I do a little chimping to ensure that I am not making that mistake but I try to keep image review to a minimum until I am at the computer.
In the upper photo, the horizon line splits the image in half. That isn't good composition. In the bottom image, I fixed that by zooming in and recomposing with more foreground. I could have also just cropped at home, but I wanted as much detail as possible. These shots were likely a second apart and you can see the difference in perspective.
Here are a couple of safety tips: keep your seatbelt on. There is a temptation to lean far out the window to get a better angle. Don’t do it. If you do stick your camera out the window, make sure it is tethered to you with the strap somehow. Also, if you have a filter on, you may want to tape it in place with duct tape or something similar. Wind tends to loosen things like that and it is a sick feeling to watch a $100 filter fall off and shatter on the road.
I have been impressed with the quality of the images. At 100% they are sharp enough to print and get good detail. While I would rather stop and take my time, sometimes that isn’t possible.
I first tried this on a bus in China. I was shooting a Nikon D7100 (DX format) at the time and didn’t want to use ISO above 400. I paid the price for that in blurry images but I still ended up with a lot of photographs of the countryside that no one else on the tour had.
It is well worth shooting from the vehicle if that is your best option. I hope you will try it and let me know if these techniques work for you.

"WOW. What a phenomenal piece you wrote. You are amazing." Jennifer Jackson
That is embarrassing, but actually a fairly typical response to my nature essays. Since The Best of Nature is created from the very best of 16 years of these nature essays published weekly in the Idaho Falls Post Register (online readership 70,000), it is a fine read. It covers a wide variety of topics including humorous glimpses of nature, philosophy, natural history, and conservation. Readers praise the style, breadth of subject matter and my ability to communicate complex and emotional topics in a relaxed and understandable manner.
Everyone can find something to love in this book. From teenagers to octogenarians, from the coffee shop to the school room, these nature essays are widely read and enjoyed.
Some of the essays here are my personal favorites, others seemed to strike a chord with readers. Most have an important message or lesson that will resonate with you. They are written with a goal to simultaneously entertain and educate about the wonderful workings of nature. Some will make you laugh out loud and others will bring a tear to the eye and warm your heart.
Readers Write:
"You hit a home run with your article on, Big Questions in Nature. It should be required reading for everyone who has lost touch with nature...great job!" Joe Chapman
"We enjoyed your column, Bloom Where Planted. Some of the best writing yet. The Post Register is fortunate to have your weekly columns." Lou Griffin.
To read more and to order a copy, click here or get the Kindle version
Copies are also available at:
Post Register
Island Park Builders Supply (upstairs)
Barnes and Noble in Idaho Falls
Harriman State Park, Island Park
Museum of Idaho
Valley Books, Jackson Wyoming
Avocet Corner Bookstore, Bear River National Wildlife Refuge, Brigham City, Utah
Craters of the Moon National Monument Bookstore, Arco, Idaho