High Dynamic Range (HDR)
It is a well-known fact that an image can only capture a fraction of the range of light that our eyes can see. In high contrast situations, you are going to have to make a choice between light areas and dark areas. In years past, we would resolve this to a degree with bracketing the exposure, say a stop or two on either side of the recommended exposure. Then we had some options to choose from. Still, it was always a compromise and the photographer had to decide between blown out highlights or black shadows without detail. You couldn’t have both.
The digital age of photography has changed that. Now it is possible to get exactly the right exposure throughout the entire range of light in the photograph through a process commonly called, HDR. High Dynamic Range, what HDR stands for, is just that: a technique to capture the entire range of light in the scene with detail in both the highlights and the shadows.
Sound impossible? Well, it still is on a single capture. With tools like Photoshop you can certainly get closer by using fill light, darkening light areas etc., but that still isn’t usually enough in really contrasty situations. The secret to HDR is that it doesn’t try to do it all on one image. With HDR, you make two or more images at different exposures and then combine them using software that takes the best exposure from each. Below is an example of a three image capture that has been combined into a single image.
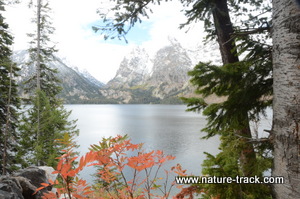
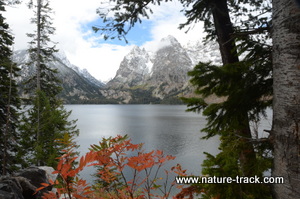
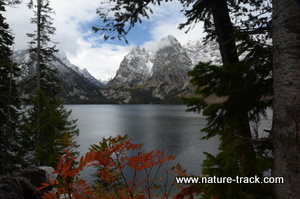
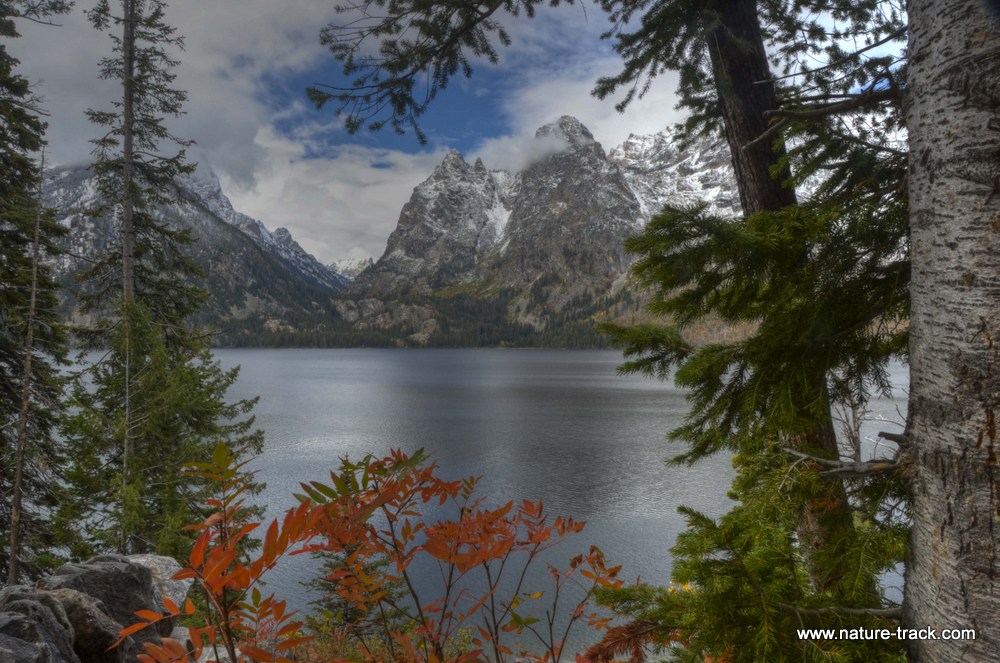
IMAGE CAPTURE
The first thing you have to do is create the image series that you want. It is imperative that there is absolutely no movement between images or they won’t register together properly. So, use a tripod. I have tried handholding, even using the self timer, but I find that I inherently move slightly (sometimes a lot) between frames. That just won’t work. Even a slight breeze that moves vegetation will be vexing as the vegetation may be blurred in the final image.
Additional things you can do to ensure a perfect series include using the self timer or a remote release and using the mirror lock up function. I know that with my Nikon 7100, if I use the self timer with the bracket function, the timer will take all the required frames before it stops so I don’t have to touch the camera at all.
In most cases, you want to change the shutter speed and not the aperture with the bracketing. This way you maintain the same depth of field in all the photos.
Capture from two to five images. The number will depend upon the contrast within the photo. I find that three photos are usually what I require.
If your camera has the auto bracketing feature, that is the best way to go. I usually set the bracket for one stop over and one stop underexposed. With a five image bracket, you may want to reduce the range between each image down to 2/3 or even ½ stop. I find that two stops overexposed generally is too much and seldom use that final image in the exposure “sandwich”. In other words, if I shoot five images at one stop difference each, I will often only use the first four, leaving out the two stop overexposure. Hence, if you want a little more tonal range, drop the bracketing margin to something less than one.
I often can tell that I want to skew the bracket sequence toward the darker or lighter side and not just bracket on either side of an exposure. I can accomplish this by using the compensation dial. For instance, say I want to skew the entire sequence toward the darker end because I know that if I don’t the more exposed images will be too overexposed to work well or it’s a very bright scene and I need to capture more in the dark end of the spectrum. In that case, I would set the exposure of the base image (the one that the bracketing is based on) to be a stop or more darker than the meter indicates. Then the underexposed image will be two stops underexposed as opposed to one stop and the overexposed image will actually hit right on with what the meter suggested.
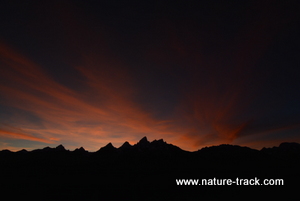
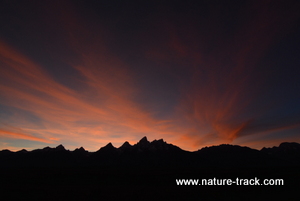
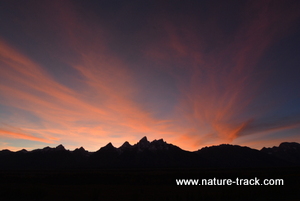
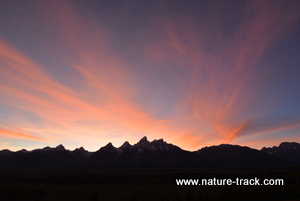
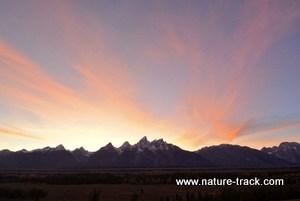
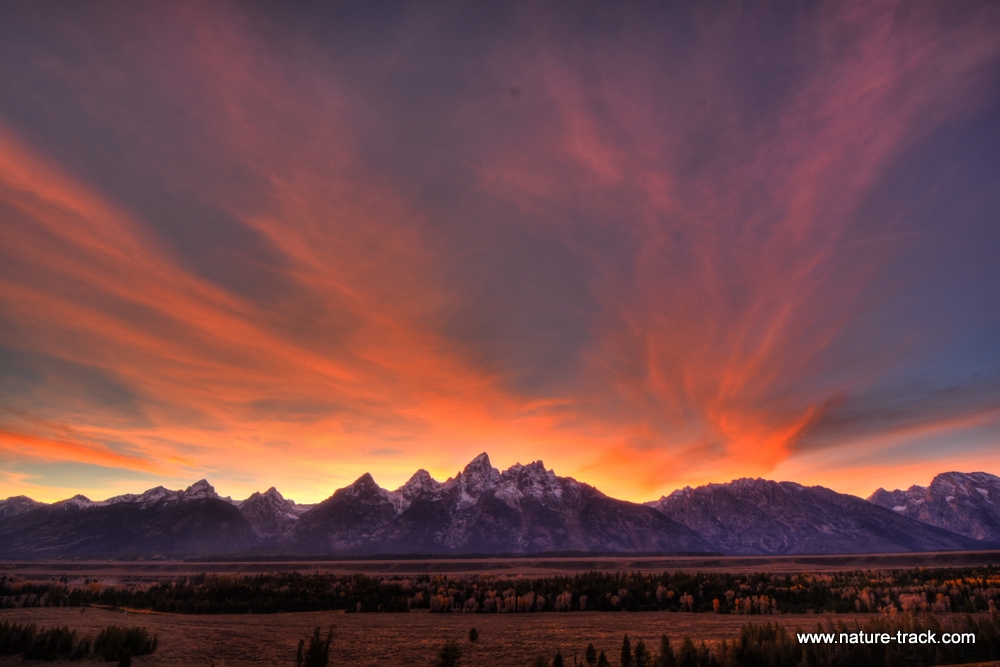
However, there are times when the dynamic range requires a full five exposures. See the example below of the Teton Range in Teton National Park. The sky was incredible but I didn’t want to have the foreground go to silhouette. I wanted to see in the image the detail that I could still make out with my eye. There was at least a five stop difference though to capture it. I could have made three images each with a wider exposure spread (one and a half to two stops each instead of one stop) but I chose the five images at one stop intervals. Again, you may feel that the final image is, “over the top” but of the six images below, it is more representative of what I was really seeing than a silhouetted foreground or a washed out sky with a recognizable foreground.
PROCESSING
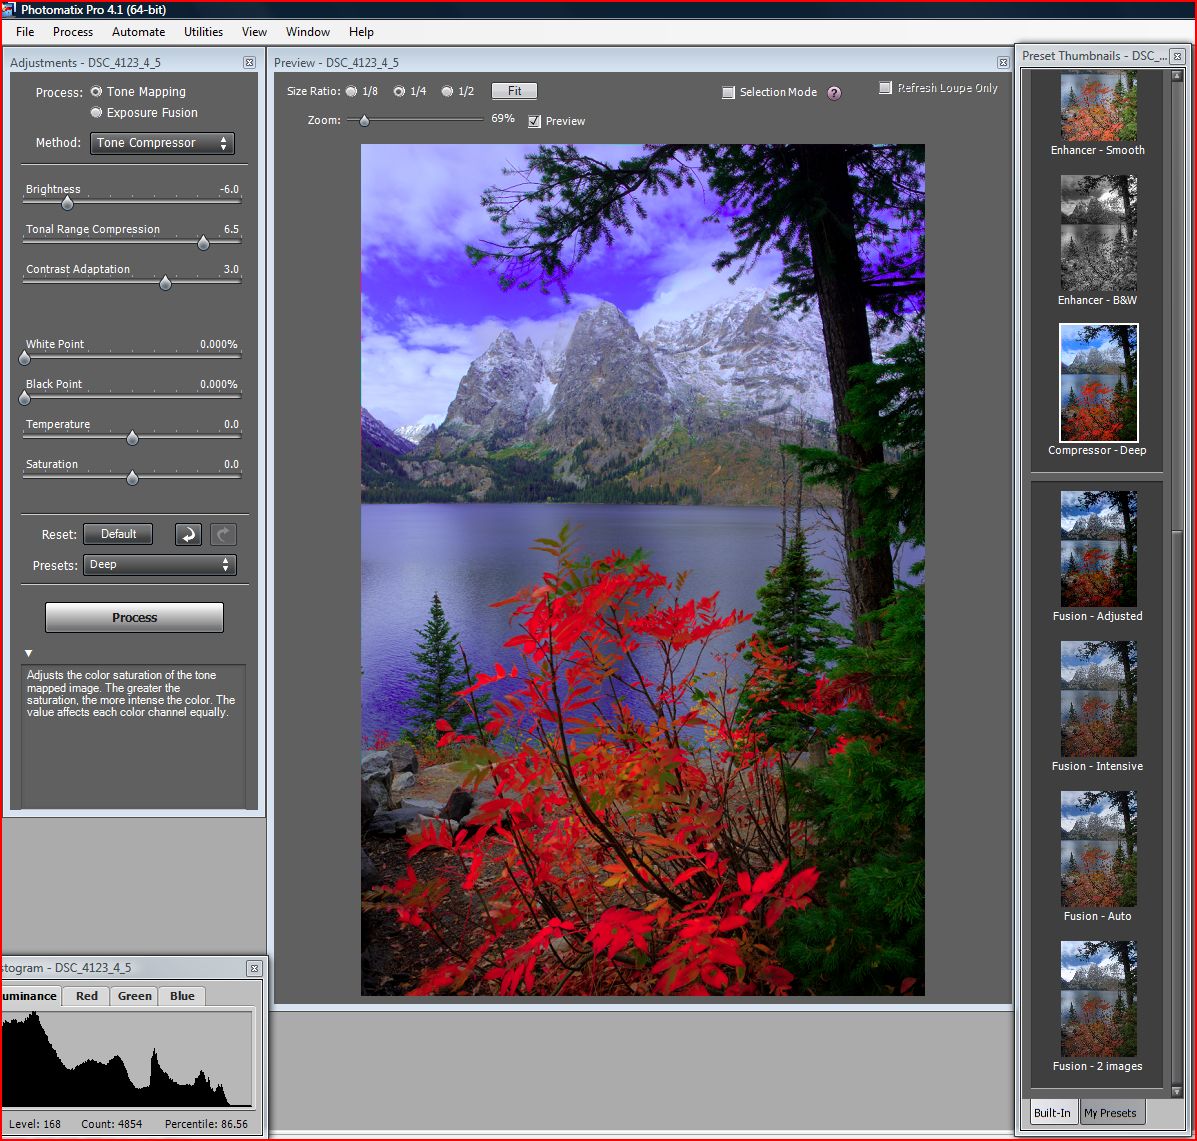
There are many software packages available that can produce HDR. I use Photomatix Pro 4 and find it very easy to work with most of the time. Photoshop CS6 also has an HDR component. While I will show you how Photomatix works, I suspect that the other programs are similar to operate.
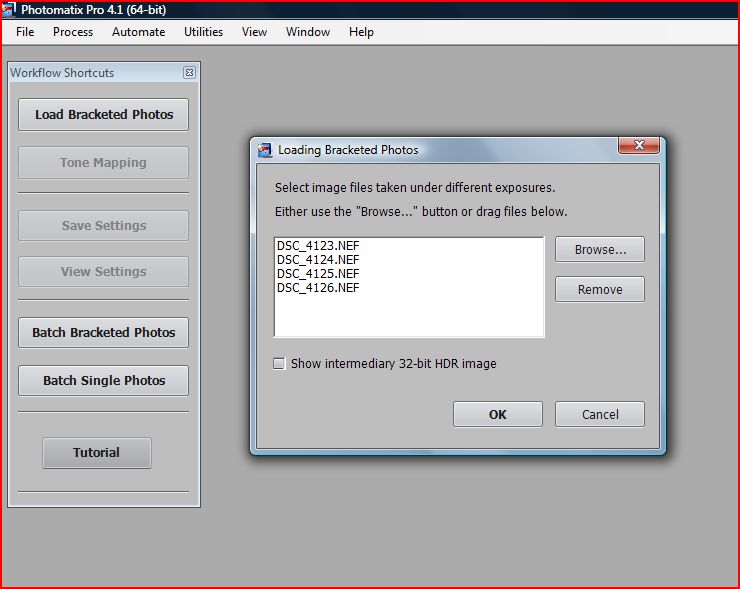
Once you have downloaded your files to the computer and selected the images you want to combine, open up your software. In Photomatix you then select, LOAD BRACKETED PHOTOS and then BROWSE in the subbox. Navigate to your images and select them.
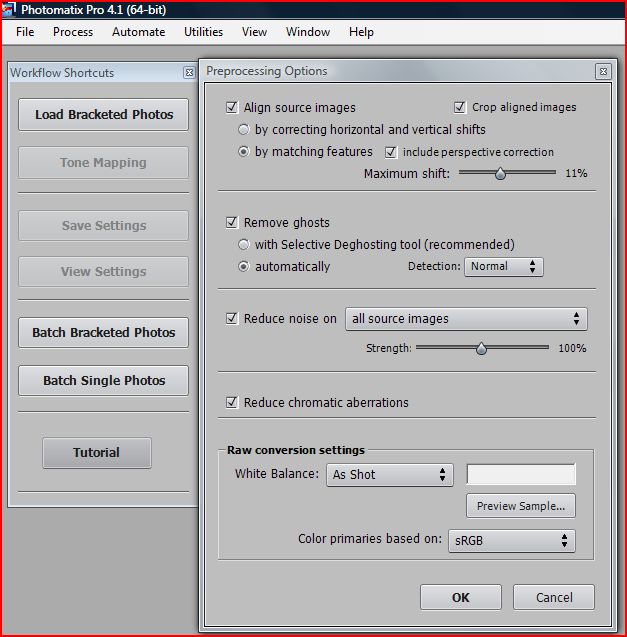
When the PROCESSING OPTIONS box pops up (below) I usually check all the boxes. When you click on OK, be prepared to wait as it takes awhile to process.
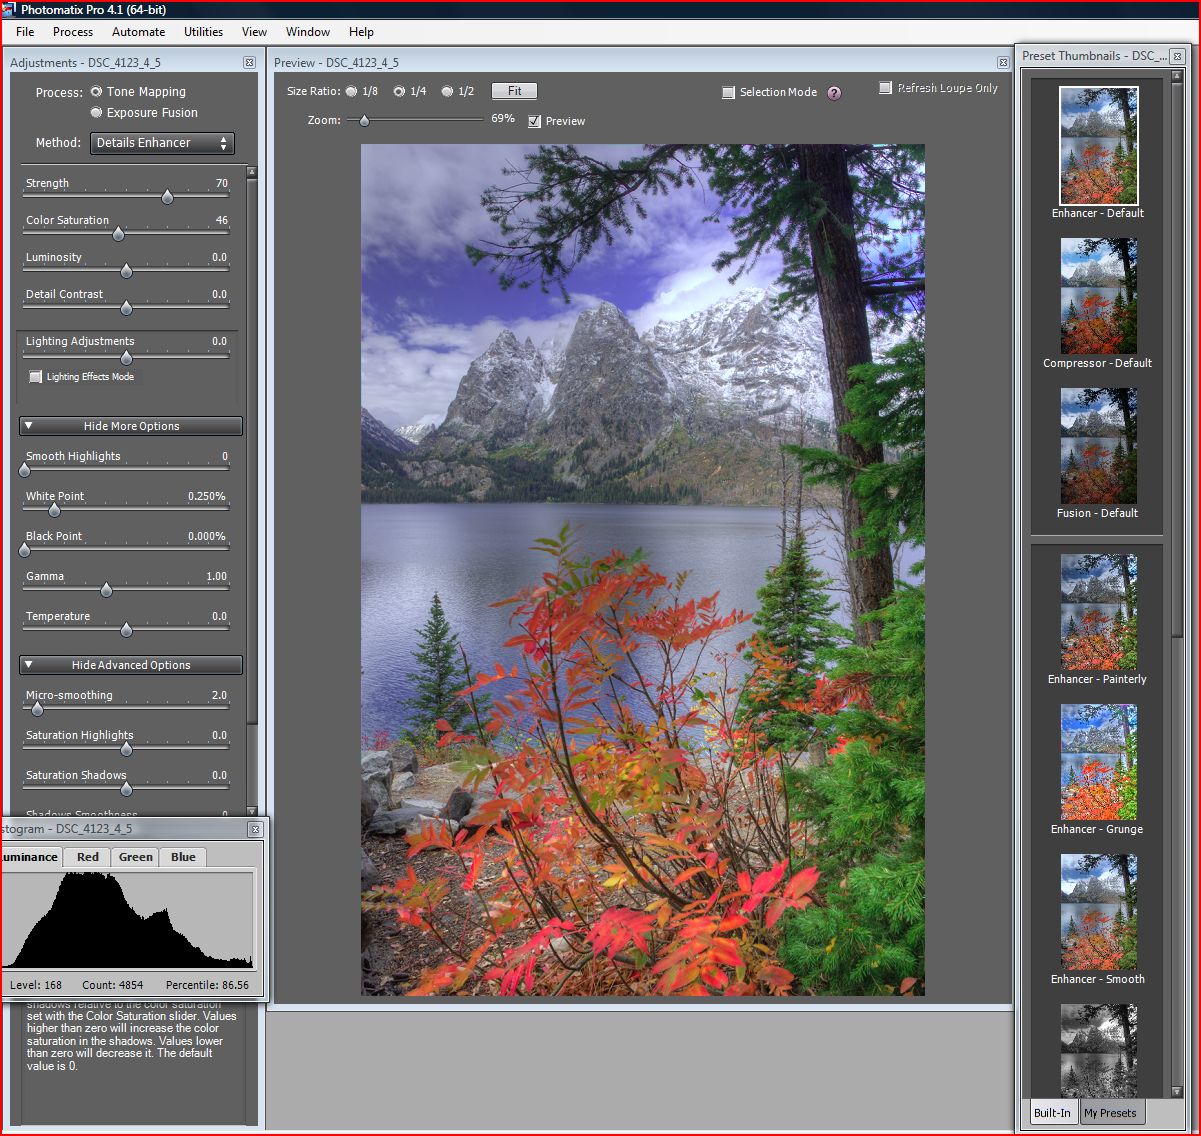
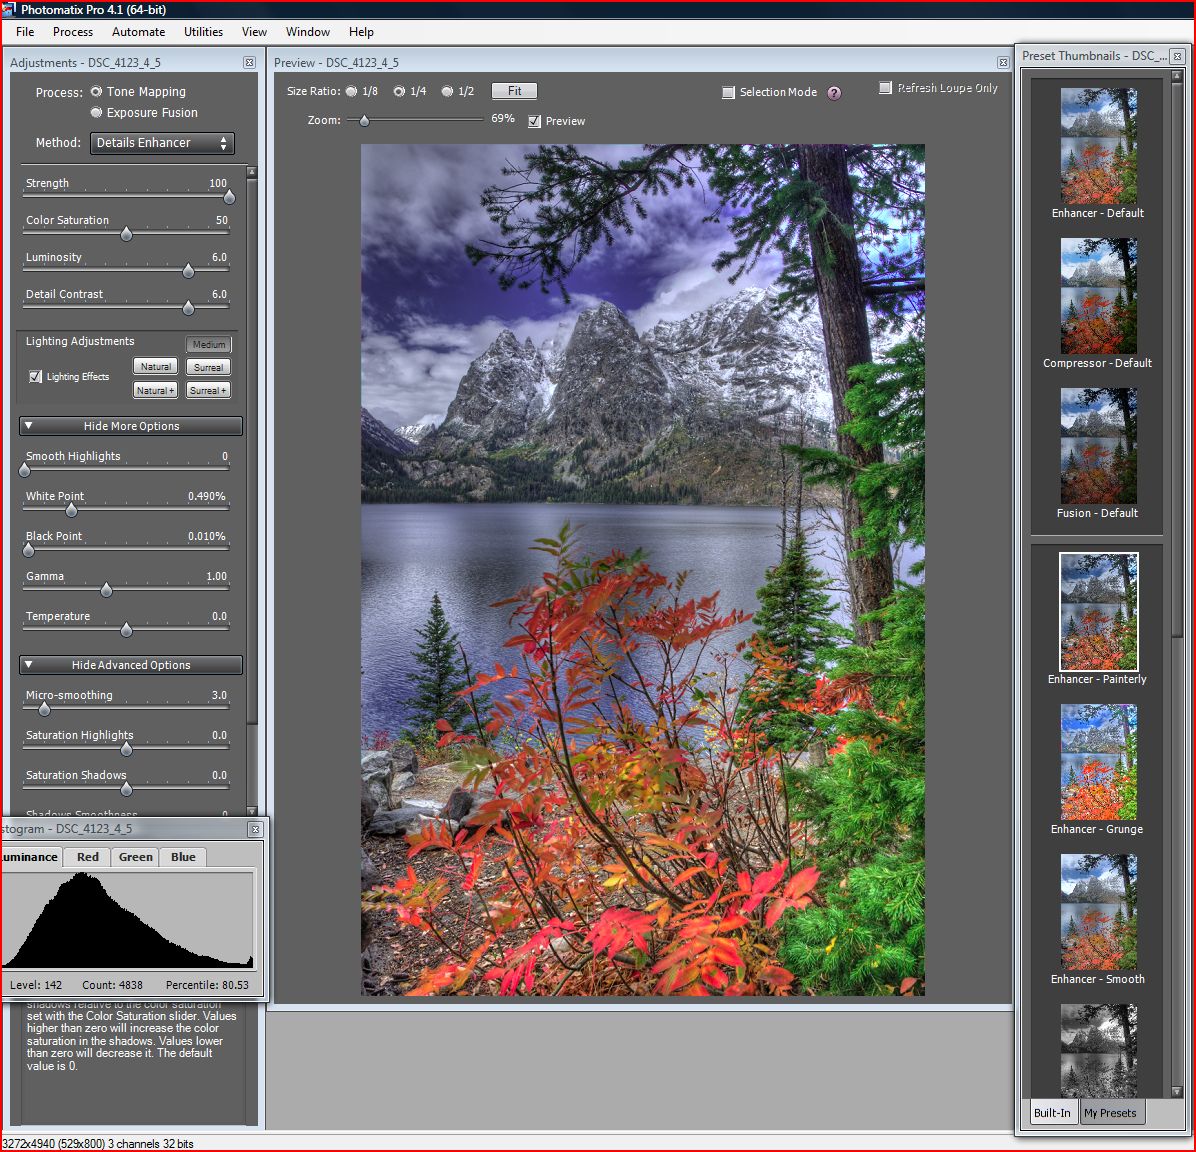
Finally, the image will pop up. You can experiment with the 12 pre-selected effects from the toolbar at the bottom (see below). Once you select an effect, specific tools will appear to allow you to make adjustments to that image. If you don’t like it, you can just choose another one.
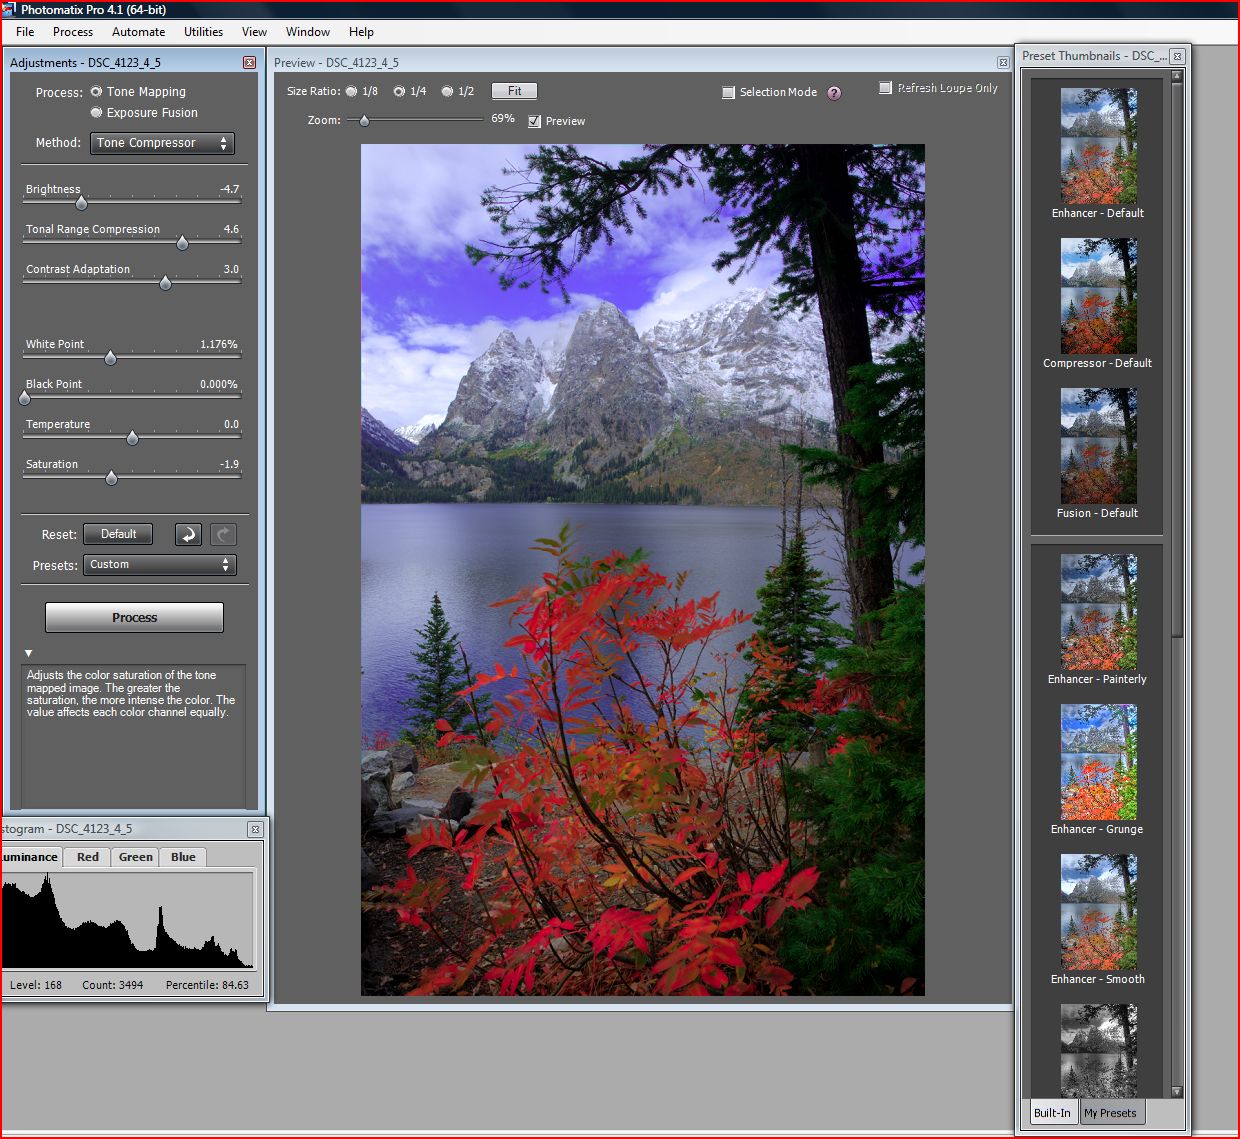
You can select a number of effects from grunge to painterly. Many professionals use HDR but tone down the effect to look perfectly natural. In the photo below, some might think that HDR has been overdone. Some say that if you can tell it is HDR it is poorly done.
Personally though, I like the look of a bit stronger HDR effect. I don’t think that makes me an amateur, I just think it reflects what I like. To me, Fusion-Auto gives very realistic color and would be my first choice if I want “au natural”. Now, granted, other programs may have other names for Fusion-Auto. You will just need to spend a little time playing with the program you have, exploring each option, to find the one or ones that you like best. The great thing is that you can process the same image in multiple ways so you really don’t have to choose, at least at this point. Below are several different ways to process the image. You can also see the other automatic choices down the side.
Once you have the image the way you want it, click on the PROCESS button. When the image has been processed, save it to your computer.
Below are several more examples of HDR in action.
High Dynamic Range is a great tool that allows photographers to really capture everything the eye can see. You can produce details in the shadows and in the highlights like you have never been able to do before. I hope you will try it.
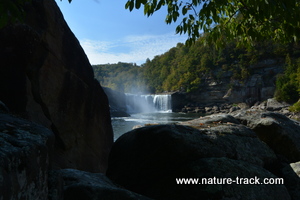
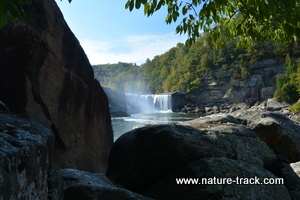
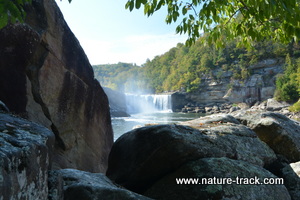
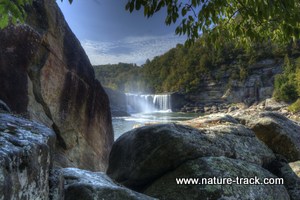
Cumberland Falls, Kentucky
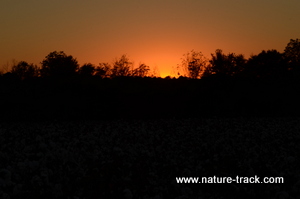
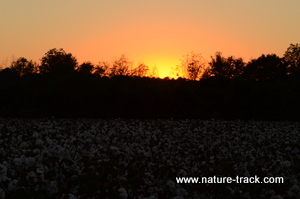
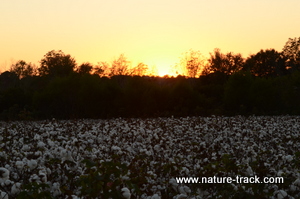
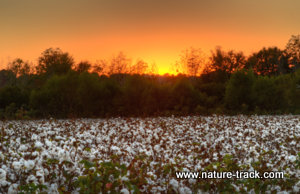
Georgia cottonfields