Building a Nature Wall
I got this idea from Condie Ward, a seasoned pre-school teacher in Westport, Connecticut. It is a great idea because it is really two or three activities in one.
First, you get to go outside and find the materials to make the wall. I did this with some grandkids and found that I needed to make a thorough explanation of what we were going to do before they bought into the project. However, once in the field, they loved every minute of finding the materials to build the wall.
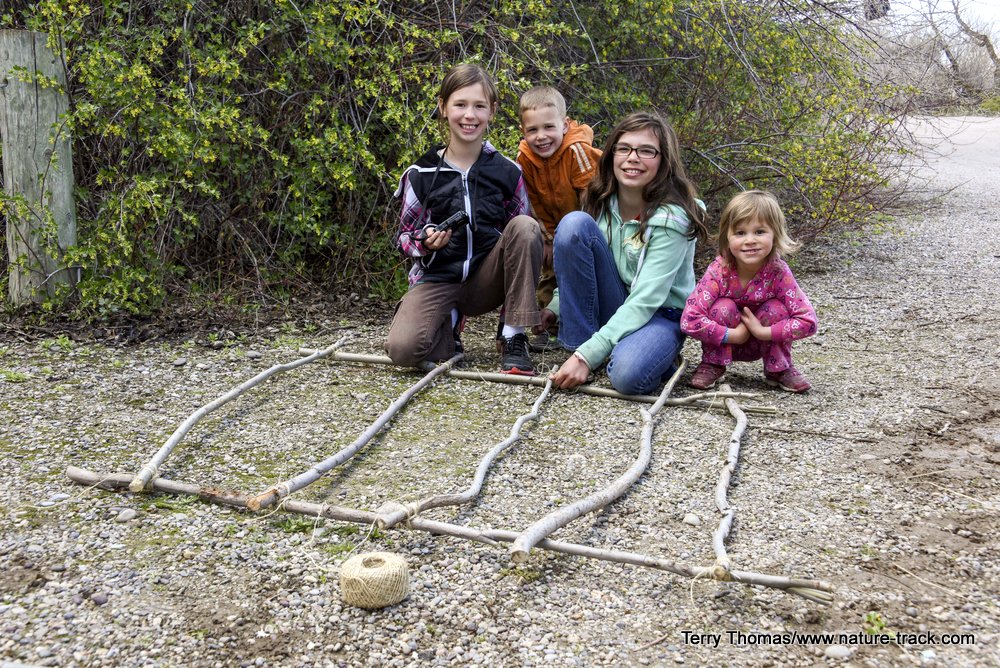
The next step was to actually build the wall. This too was fun and the kids got to learn how to do a few knots and lashings as well.
Third is to set it up and begin filling it. For this particular wall, my grandkids have been adding nature stuff to it ever since they built it. I think the photos are pretty self explanatory, but I will address the actual construction anyway.
Tools and Materials:
10-12 long poles. You can buy them at a garden store but we wanted to cut our own willow poles as part of the outing. Willows worked fine. I preferred poles with some "character" to them such as bends and twists.
Natural string like hemp. If you want to make the project a little easier for the kids to tie, consider driving a screw in at each intersection. That way it will stay put when they are tying. In that case you will need a cordless drill and bit and 30-35 screws about 1.5 inches long.
A saw for cutting them to length. This is somewhat arbitrary as you can make the wall larger or smaller, depending on the space you have. I found that about 5x5 feet worked well.
Some way to anchor it to a wall. Ms Ward recommended U-bolts but I think that four long screws into wall studs is better. It depends on what you are going to put it against or mount it to.
To build it:
Lay five sticks on the ground about 1 to 1.5 feet apart (this depends on how long your sticks are). Then lay one perpendicular across them. At each intersection, lash the sticks together (this is where you might want to put a screw in first) using either an X pattern or a square lashing. Repeat with four more sticks.
To Mount it:
With another adult, hold the frame where you want to mount it and using the mounting system you have chosen, firmly attach it to the backing. You can remind the kids that it is not a ladder or a climbing wall, but mount it securely because, if they are like my grandsons, they will try it anyway.
Now comes the fun part and something that can last for months or even years. The kids get to collect nature items and add them to the wall. They can hang them with string, wedge them in or set them on the frame as they desire.
There is no limitation to what goes on the wall. You can change it seasonally, watch it grow over the years and add and subtract as you and the kids see fit. If the kids are bored, you can send them outside to find new items for the nature wall. I would draw the line at things that would easily spoil or decay, but other than that, just about anything will do.
Writing this has gotten me so fired up that I might just build a nature wall into my new office this summer. Heaven knows I have plenty of items to put on it!
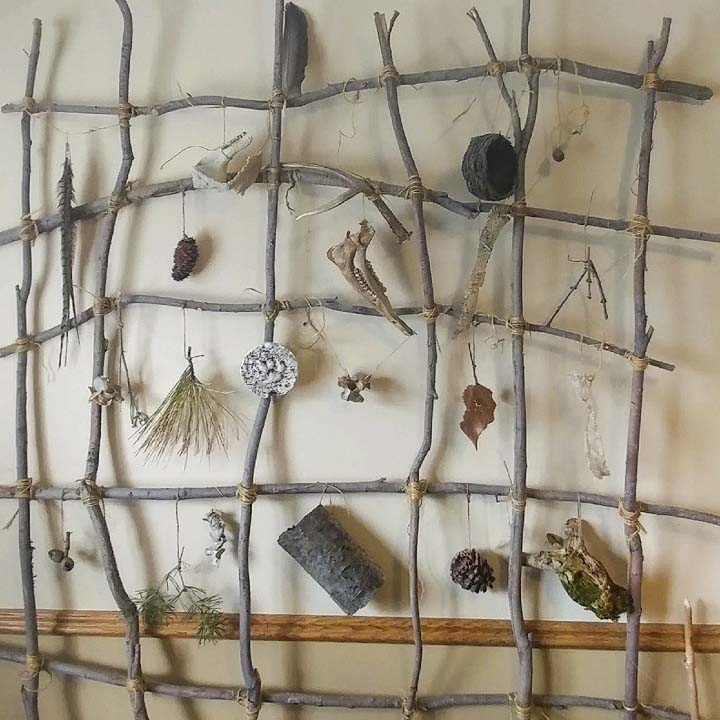
My grandkid's nature wall.
Here is a short list of ideas of what to hang on the Nature Wall:
pinecones
antlers
leaves
feathers
shed snakeskin
seed pods
sanitized owl pellet
cattail top
seashell
corncob
bark
rocks (not too big or set them on the floor)
different woods
bits of moss
plaster casts of tracks (a whole other activity)
Here is one last hint. I typically dip items that I want to keep into a Polyurathane-type solution and let them dry before placing them on a shelf. This holds the items together (a cattail head could be a real mess if you don't do this) a lot better. Clearly, I would not dip things like feathers, but I would dip owl pellets, seed pods, cleaned skulls and such. Use the water-based polyurathane as it is not supposed to yellow with time.